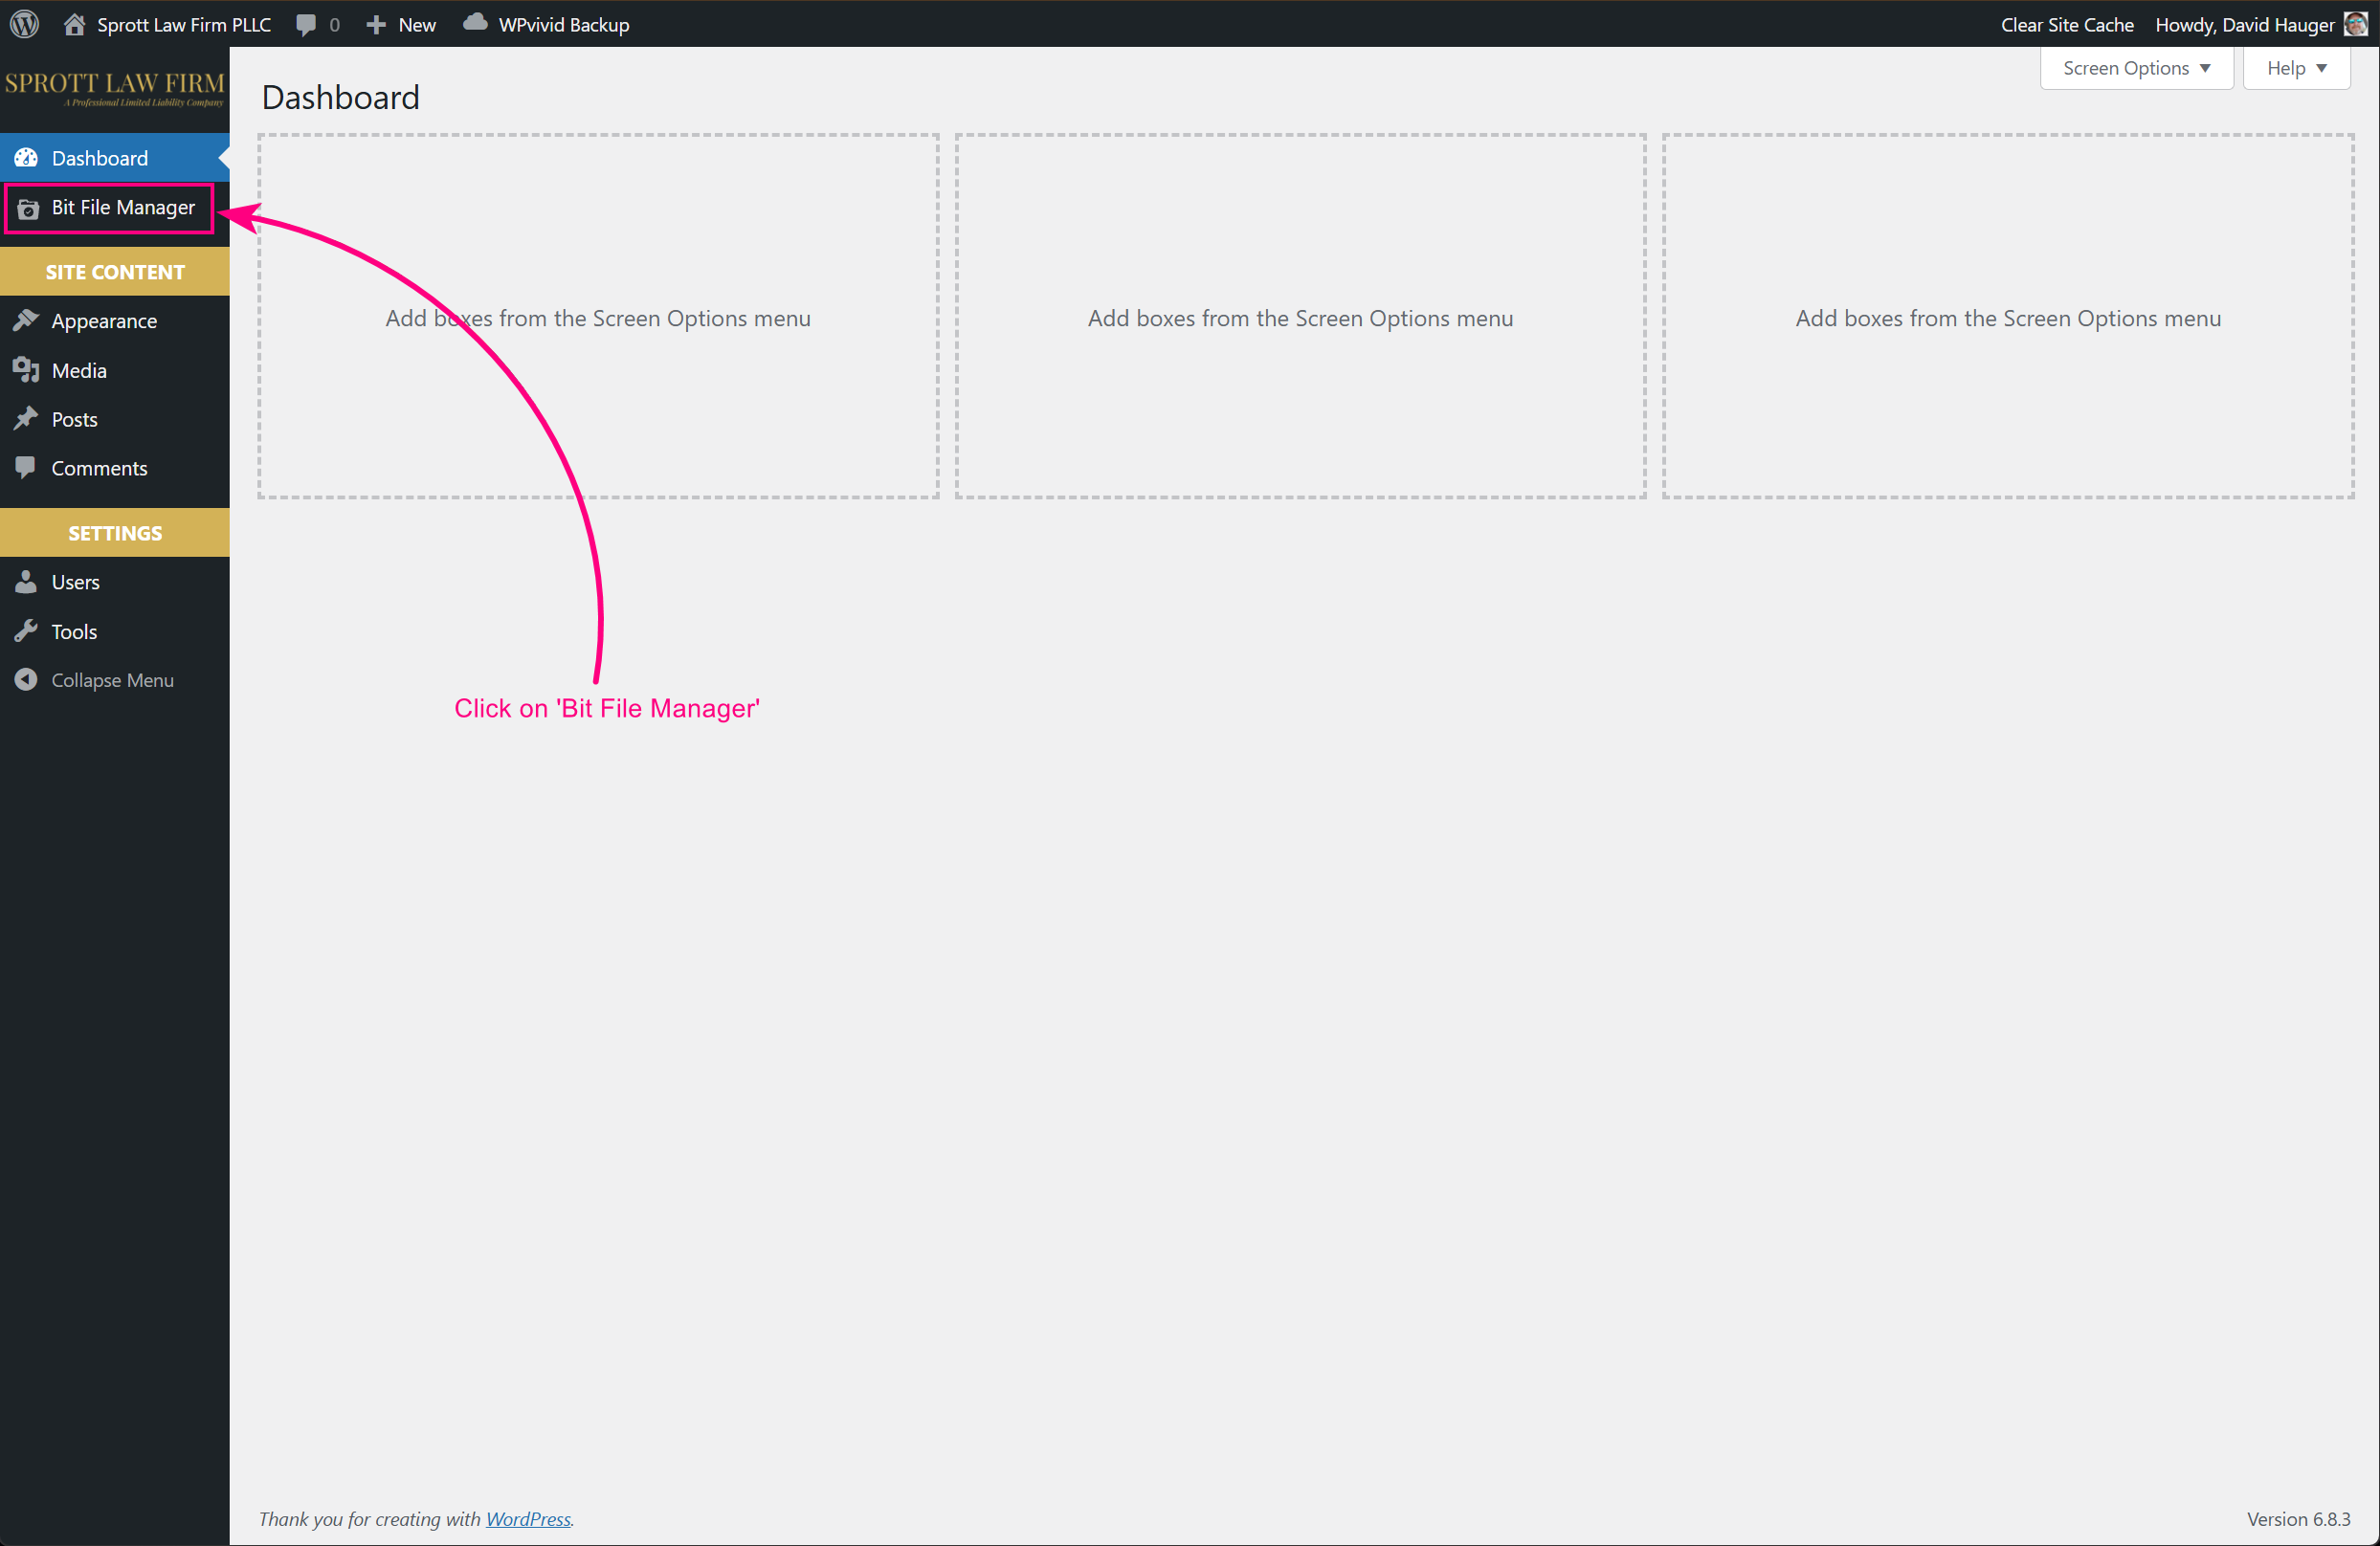
STEP 3:
Folders to Know
- “(PUBLIC)” FOLDER: Only the “(public)” folder will hold the files that are displayed on the Helpful Resources page.
- “ARCHIVED” FOLDER: The “archived” folder is to store any files you don’t want displayed on the website, but don’t want to delete for use later.
- “ICONS” FOLDER: The “icons” folder holds the file type icon graphics. This folder needs no management, but please do not remove this folder!
STEP 4:
Add, Remove, and Manage Files
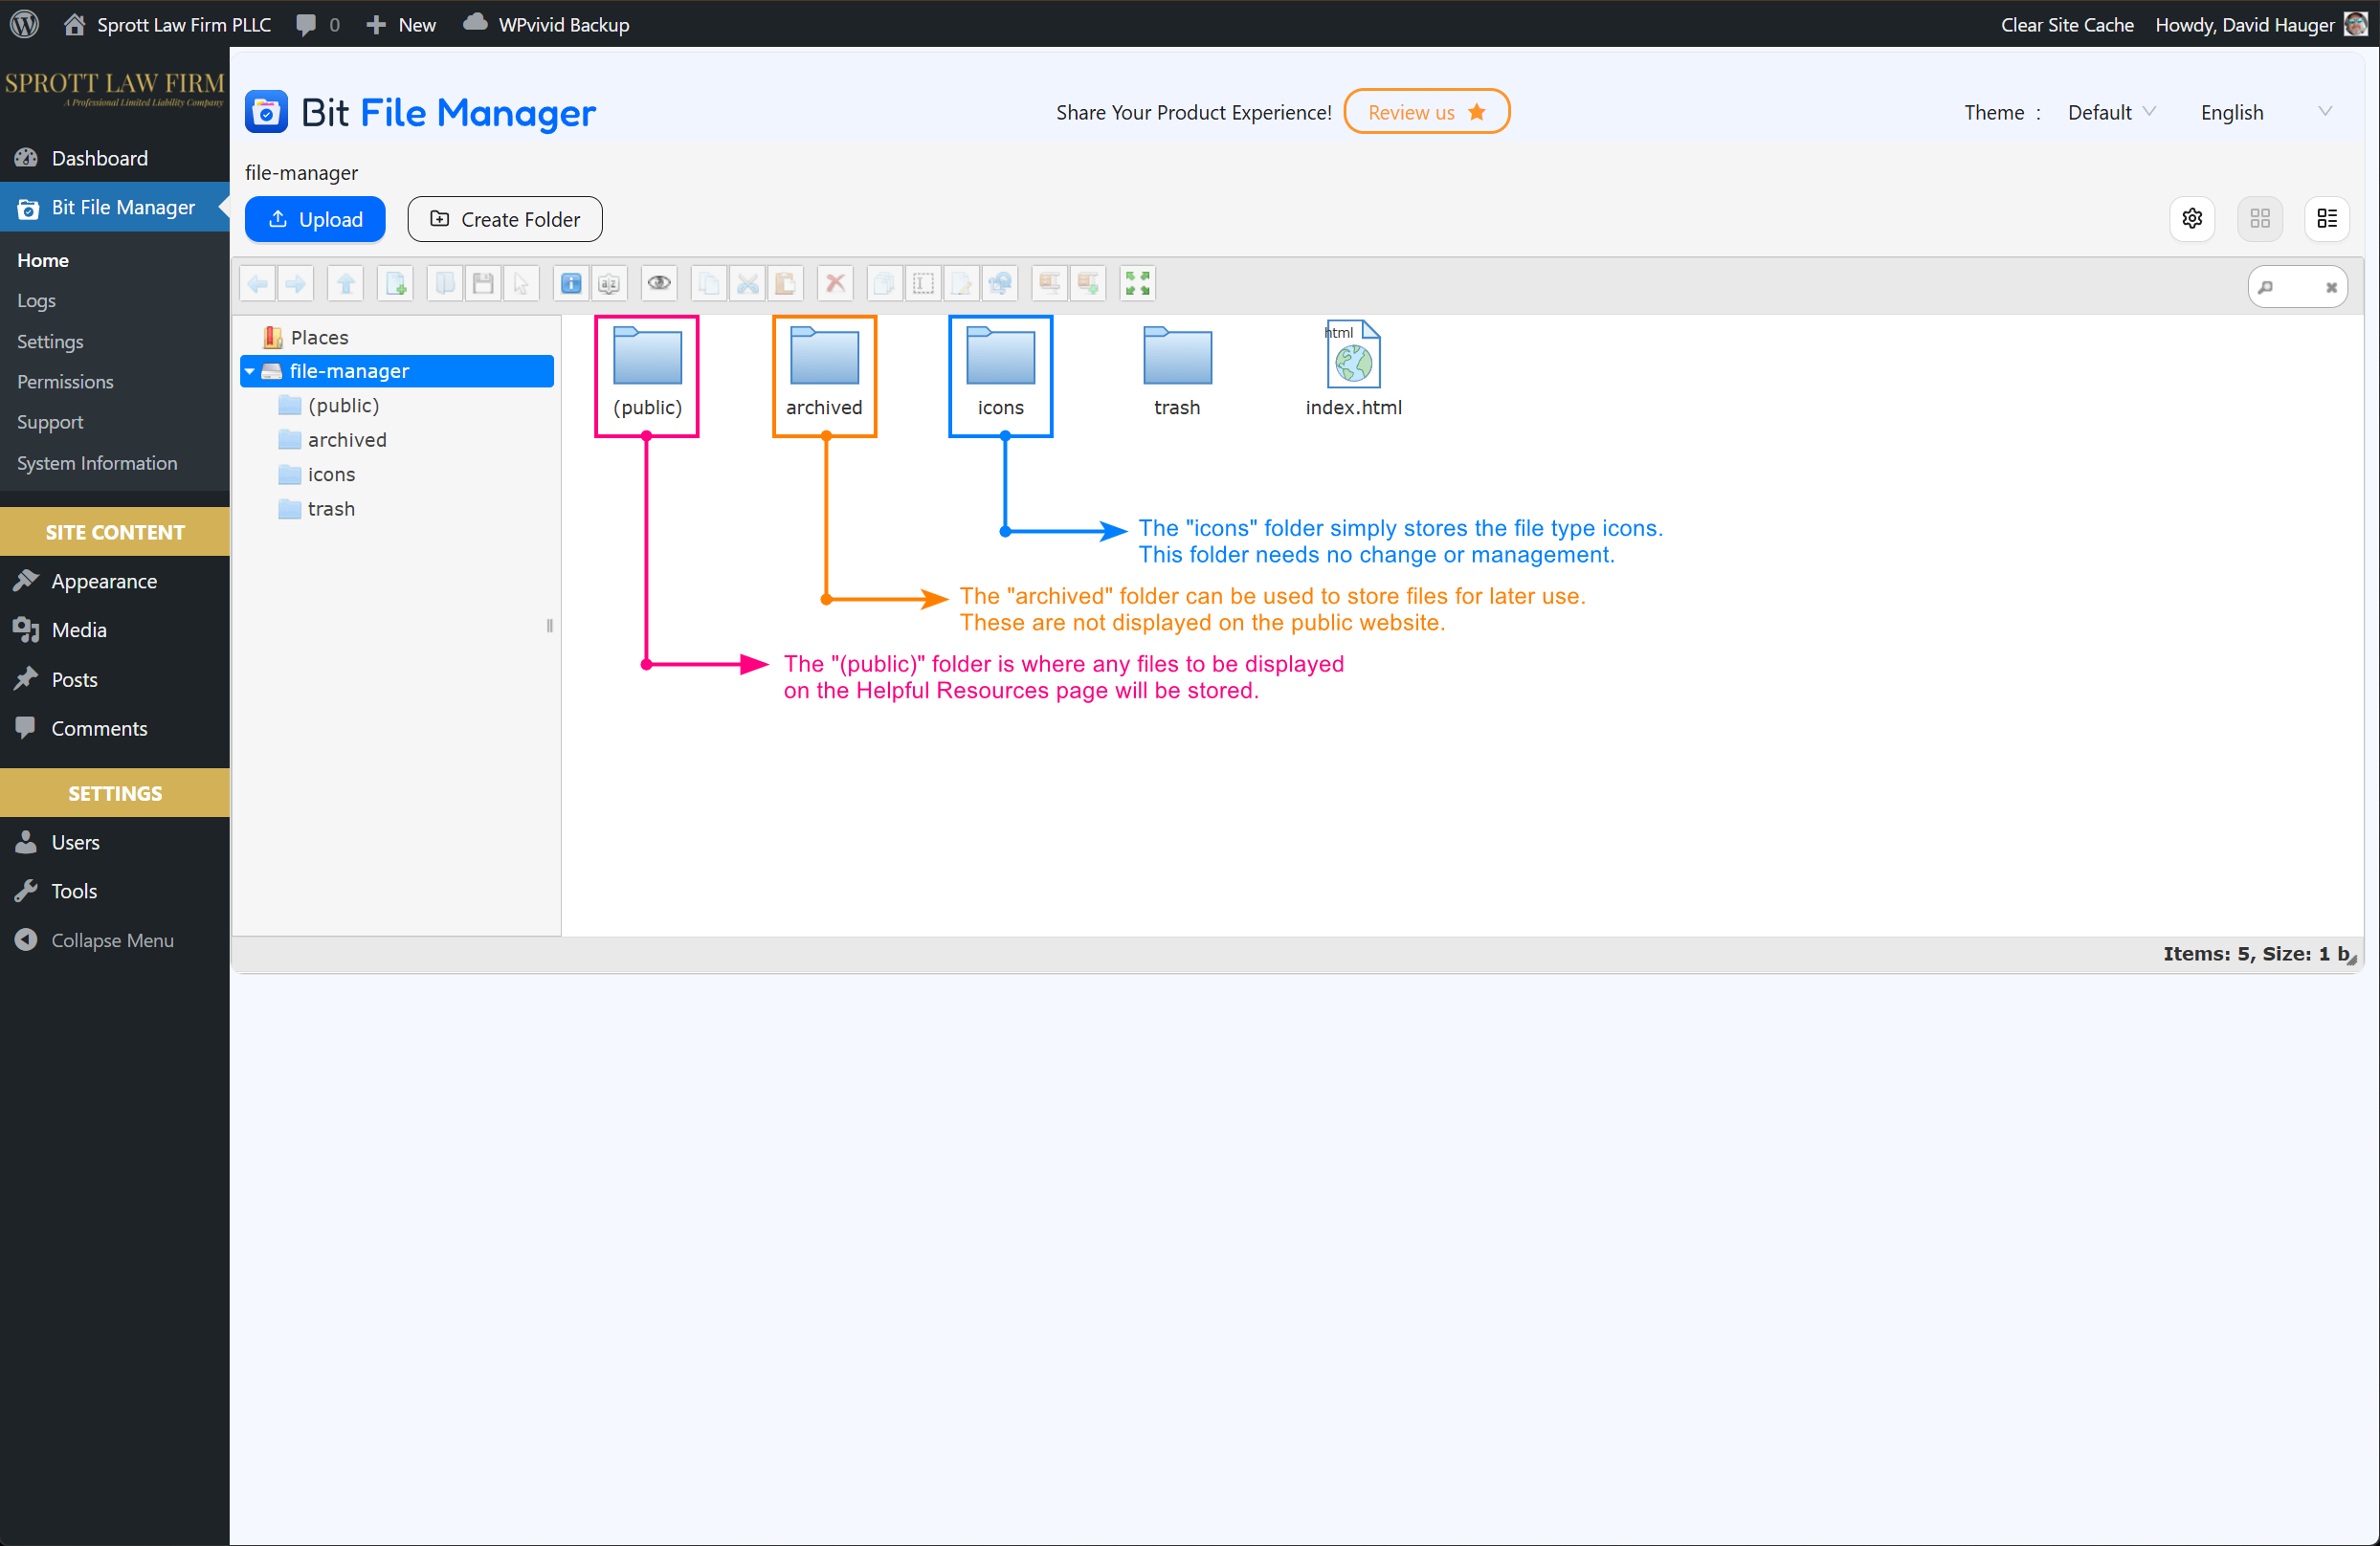
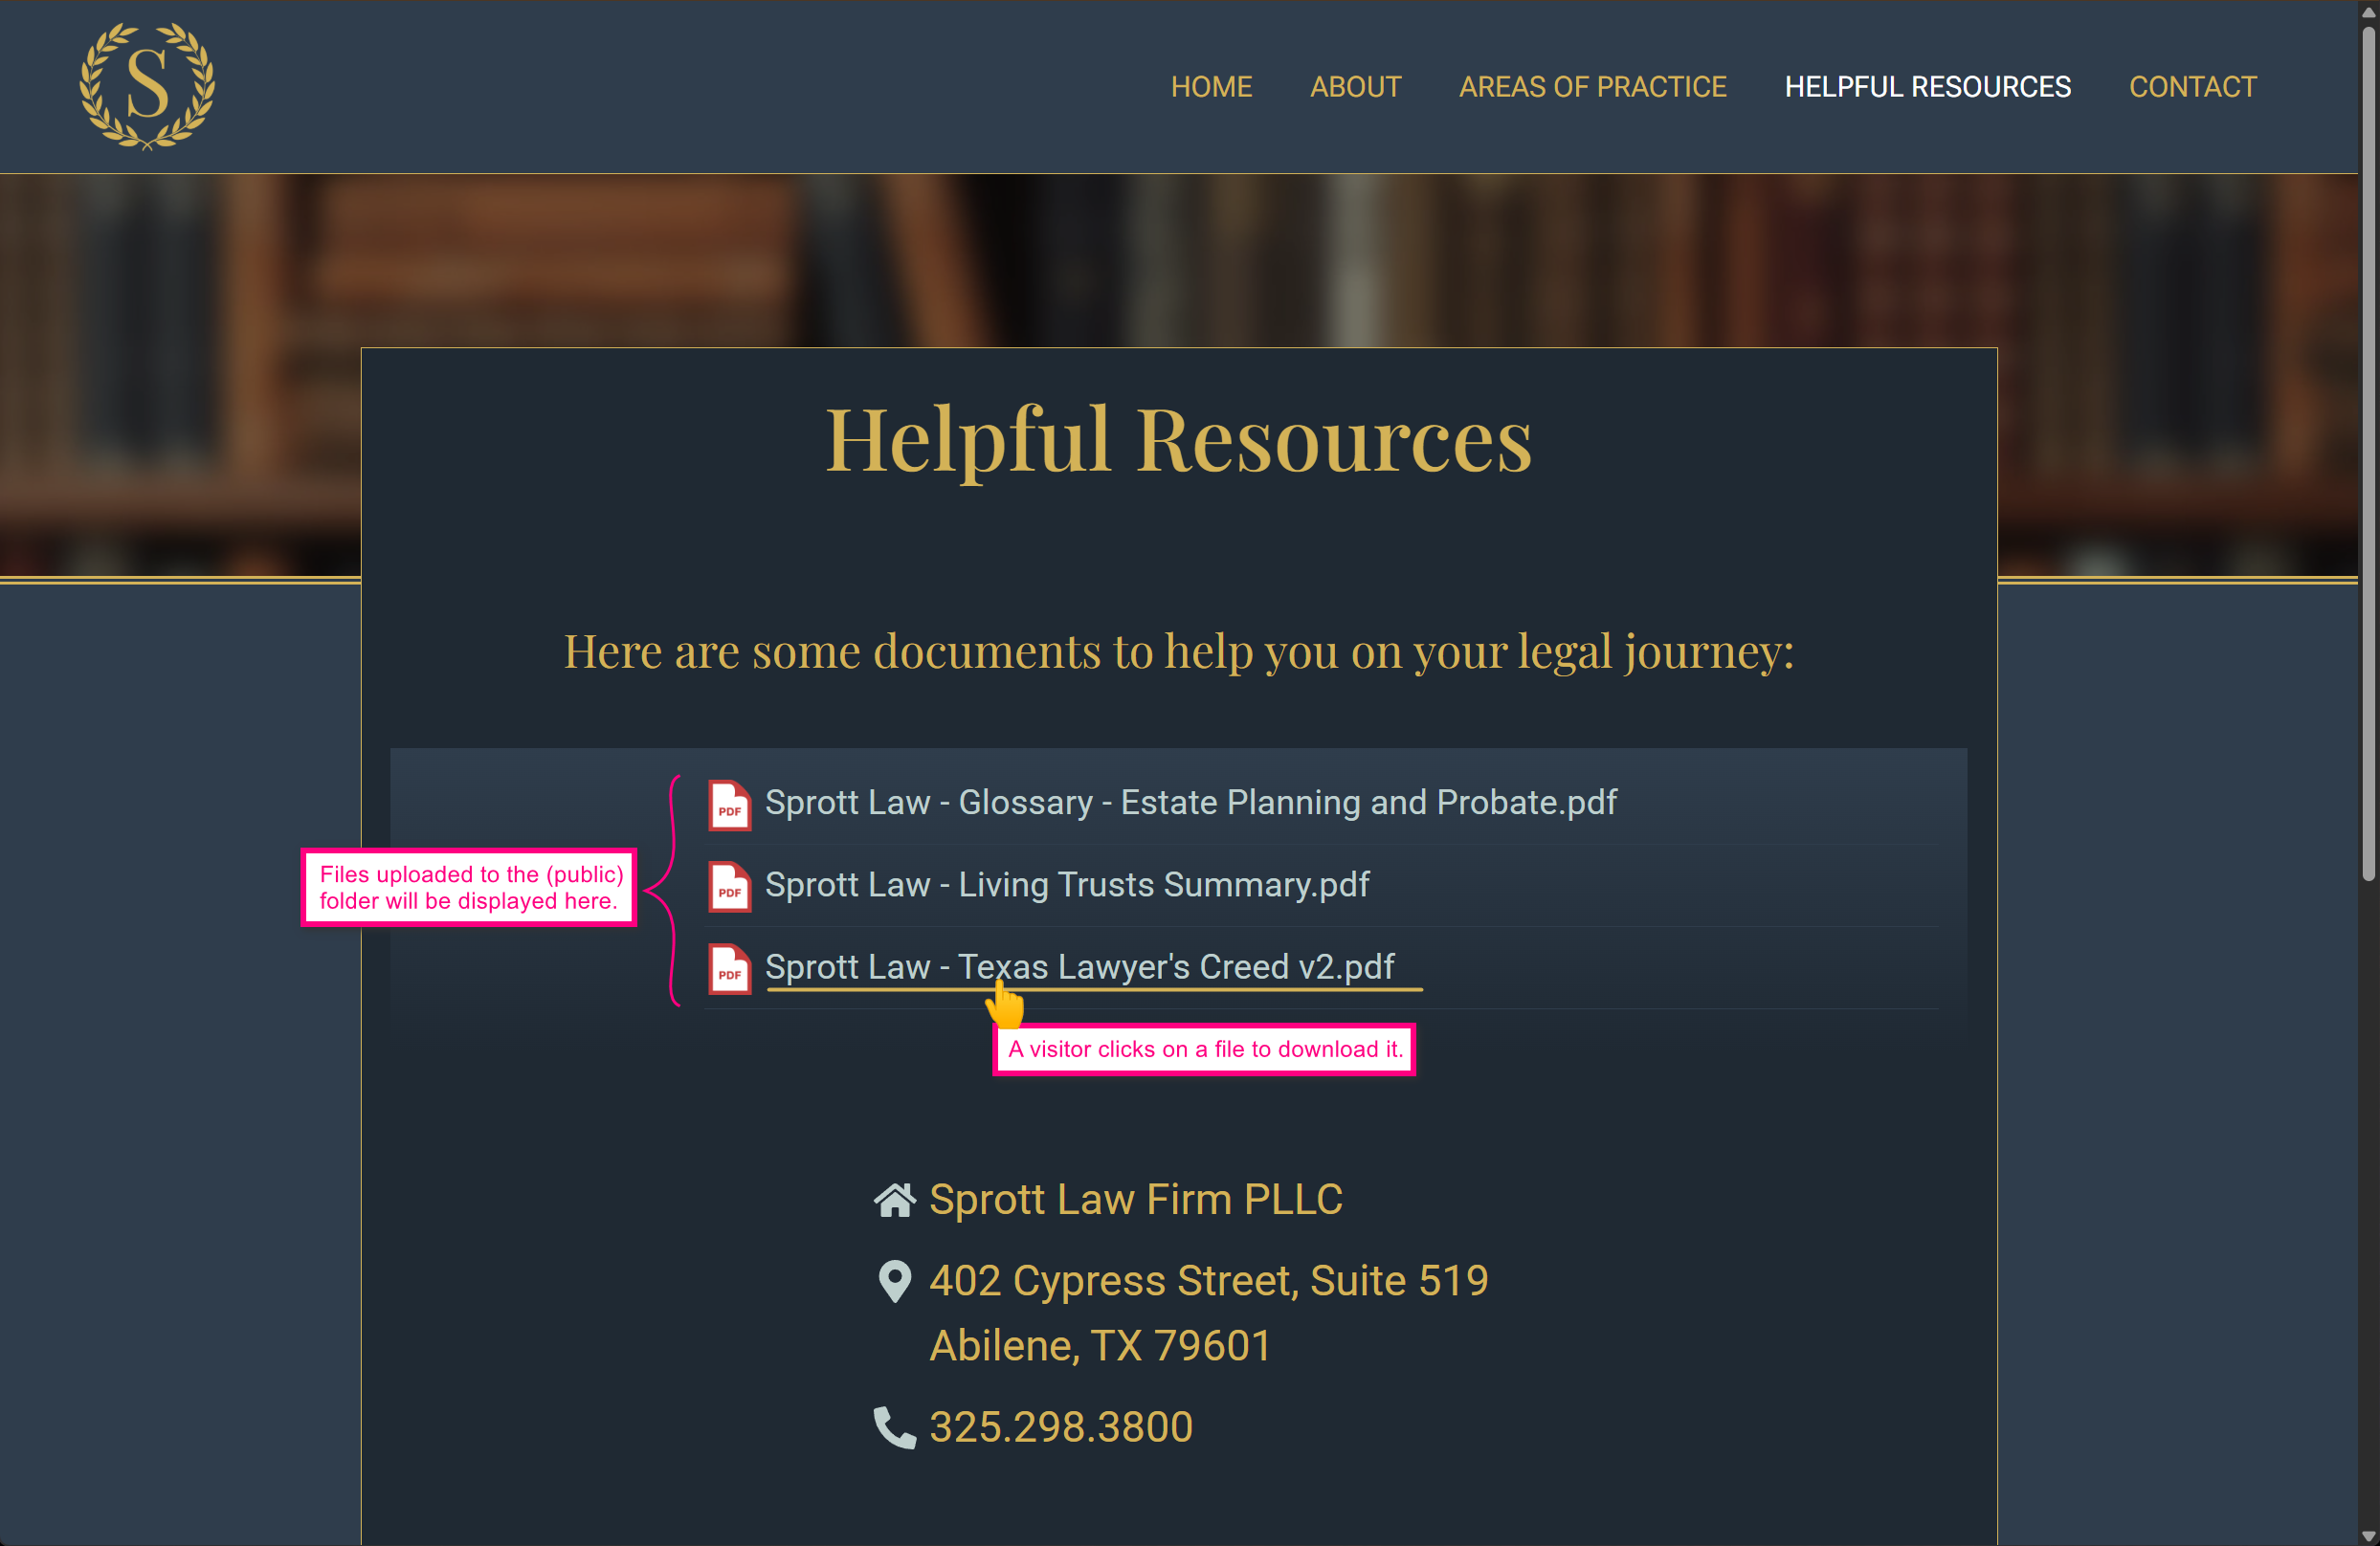
In the (public) folder, add any files you’d like to have shown on the public website.
- Add File(s): Drag and drop files from your computer to this folder, or use the “Upload” button.
- Remove File(s): Select one or more files and press the DEL key or click the delete button.
NOTE: You can also right-click on any selected file to do many operations as well.
Files Magically Appear!
The files added to the (public) folder will automatically be displayed on the Helpful Resources page.
These are displayed in alphabetical order.